Create a new to-do list document
:::tip Tutorial Repository 📦 Reference Code: step-1-initialize-with-ph-init
This tutorial step has a corresponding branch in the repository. You can:
- View the complete code for this step
- Clone and checkout the branch to see the result
- Compare your implementation using
git diff:::
Overview
This tutorial guides you through creating a simplified version of a 'Powerhouse project' for a todo-list.
A Powerhouse project primarily consists of a document model and its editor.
As your projects use-case expands you can add data-integrations or a specific Drive-app as seen in the demo package.
For today's purpose, you'll be using Vetra Studio, the builder platform through which developers can access and manage specifications of your project. Vetra Studio runs inside Connect, the Powerhouse host application that serves as a container for all Powerhouse apps and drives.
Prerequisites
- Powerhouse CLI installed:
pnpm install -g ph-cmdornpm install -g ph-cmd - Node.js 24 and a package manager (pnpm or npm) installed
- Visual Studio Code (or your preferred IDE)
- Terminal/Command Prompt access
If you need help with installing the prerequisites you can visit our page prerequisites
📖 How to use this tutorial
This tutorial is designed for you to build your own project from scratch while having access to reference code at each step.
Setup: Create your project and connect to tutorial repo
-
Create your project following the tutorial:
mkdir ph-projectscd ph-projectsph init# When prompted, enter project name: todo-tutorialcd todo-tutorial -
Add the tutorial repository as a remote to access reference branches:
git remote add tutorial https://github.com/powerhouse-inc/todo-tutorial.gitgit fetch tutorial --prune -
Create your own branch to keep your work organized:
git checkout -b my-todo-project
Now you have access to all tutorial step branches while working on your own code!
Compare your work with reference steps
At any point, compare what you've built with a tutorial step:
# Compare your current work with step-1
git diff tutorial/step-1-initialize-with-ph-init

# See what changed between tutorial steps
git diff tutorial/step-1-initialize-with-ph-init..tutorial/step-2-generate-todo-list-document-model

# Compare specific files
git diff tutorial/step-1-initialize-with-ph-init -- package.json
Visual diff with GitHub Desktop
For a more visual comparison, use GitHub Desktop:
-
First, make your initial commit (GitHub Desktop won't show your branch until you have at least one commit):
git add .git commit -m "Initial project setup" -
Open GitHub Desktop and open your repository
-
Compare branches visually:
- Click on Branch menu in the top menu bar
- Select "Compare to Branch..."
- Choose the tutorial branch you want to compare with (e.g.,
tutorial/step-1-initialize-with-ph-init) - GitHub Desktop will show you all file differences in a visual interface
-
Review the differences:
- Click on any file to see side-by-side or unified diff view
- See exactly what's different between your code and the reference
Tip: You can also use VS Code's Git Graph extension or the command palette → "Git: Compare with Branch"
If you get stuck
Reset your code to match a tutorial step:
# Reset to step-2 (WARNING: loses your changes)
git reset --hard tutorial/step-2-generate-todo-list-document-model
Quick start
Create a new Powerhouse project with a single command:
ph init
Before you begin
-
Open your terminal (either your system terminal or IDE's integrated terminal)
-
Optionally, create a folder first to keep your Powerhouse projects:
mkdir ph-projectscd ph-projects -
Ensure you're in the correct directory before running the
ph initcommand.
In the terminal, you will be asked to enter the project name. Fill in the project name and press Enter.you@yourmachine:~/ph-projects % ph init? What is the project name? ‣ todo-tutorial```
Once the project is created, you will see output like:
🚀 Initializing a new project...

▶️ Creating directory for project "todo-tutorial"...

✅ Project directory created

▶️ Initializing git repository...

✅ Git repository initialized

▶️ Creating project boilerplate files...

✅ Project boilerplate files created

▶️ Installing project dependencies with npm...

✅ Project dependencies installed

▶️ Formatting boilerplate project files...

✅ Boilerplate files formatted

🎉 Successfully created project "todo-tutorial" 🎉
Navigate to the newly created project directory:
bash cd todo-tutorial
Develop a single document model in Vetra Studio
Vetra Studio is the builder's orchestration hub for assembling all specifications needed for your package. It provides a Vetra Studio Drive to access, manage, and share document model specifications, editors, and data integrations—all through a visual interface. For deeper coverage, see the Vetra Studio documentation.
Once in the project directory, run the ph vetra --watch command to start a Vetra Studio Drive where you'll be defining your specifications. This is the preferred way to launch your development environment.
:::info What is a Reactor?
You'll notice "reactor-api" in the terminal output. A Reactor is the Powerhouse back-end service that hosts your drives, handles document synchronization, and provides the GraphQL API. When you run ph vetra --watch, a local Reactor starts automatically to power your development environment.
:::
ph vetra --watch
The host application for Vetra Studio will start and you will see the following output:
ℹ [reactor-api] [package-manager] Loading packages: @powerhousedao/vetra 14:44:19
ℹ [reactor-api] [server] WebSocket server available at /graphql/subscriptions 14:44:22
ℹ [reactor-api] [graphql-manager] Registered /graphql/system subgraph. 14:44:22
ℹ [reactor-api] [graphql-manager] Registered /graphql/analytics subgraph. 14:44:22
ℹ [reactor-api] [graphql-manager] Registered /d/:drive subgraph. 14:44:22
ℹ [reactor-api] [graphql-manager] Registered /graphql supergraph 14:44:23
ℹ [reactor-api] [graphql-manager] Registered /graphql/document-editor subgraph. 14:44:23
ℹ [reactor-api] [graphql-manager] Registered /graphql/vetra-package subgraph. 14:44:23
ℹ [reactor-api] [graphql-manager] Registered /graphql/subgraph-module subgraph. 14:44:23
ℹ [reactor-api] [graphql-manager] Registered /graphql/processor-module subgraph. 14:44:23
ℹ [reactor-api] [graphql-manager] Registered /graphql/app-module subgraph. 14:44:23
ℹ [reactor-api] [graphql-manager] Registered /graphql/vetra-read-model subgraph. 14:44:23
ℹ [reactor-api] [server] MCP server available at http://localhost:4001/mcp 14:44:24
Switchboard initialized 14:44:24
➜ Drive URL: http://localhost:4001/d/vetra-bac239dd 14:44:24
2:44:24 PM [vite] (client) Re-optimizing dependencies because vite config has changed 14:44:24
Port 3000 is in use, trying another one... 14:44:24
➜ Local: http://localhost:3000/ 14:44:24
➜ Network: use --host to expose 14:44:24
➜ press h + enter to show help
A new browser window will open when visiting localhost and you will see the Vetra Studio Drive
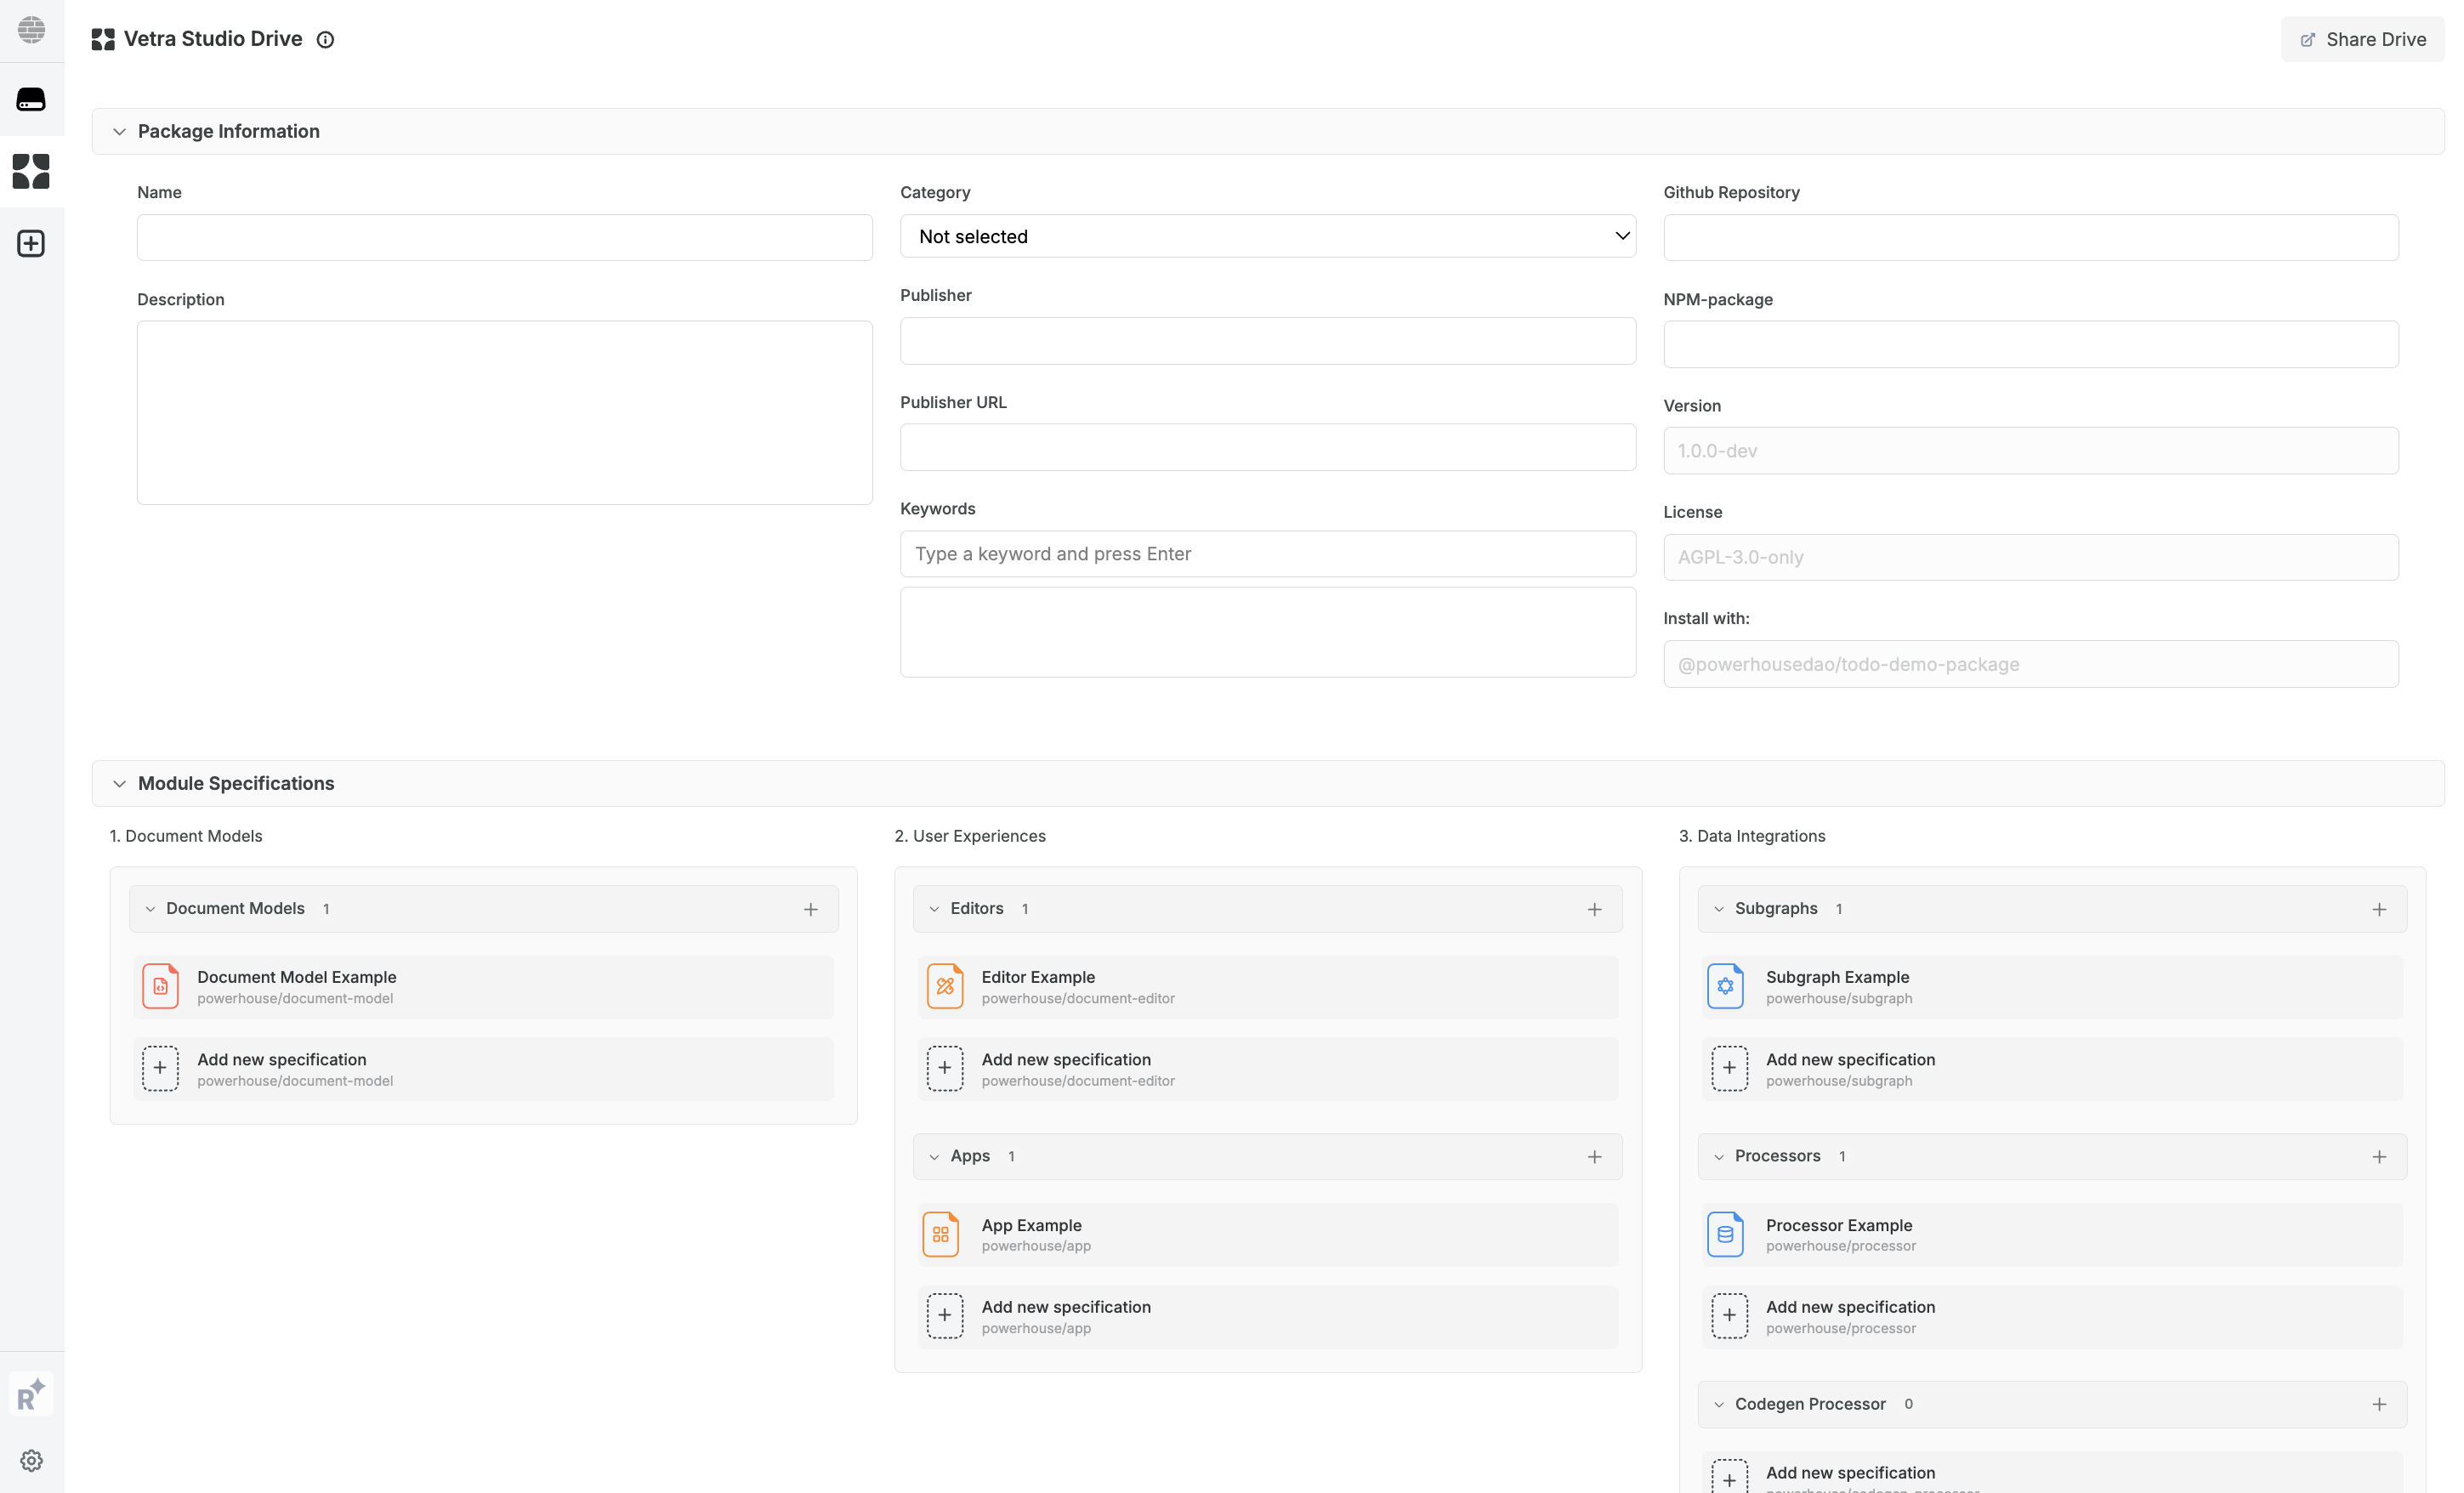
Create a new document model by clicking the Document Models 'Add new specification' button. Name your document TodoList (PascalCase, no spaces or hyphens). If you've followed the steps correctly, you'll have an empty TodoList document where you can define the 'Document Specifications' in the next step.
Alternatively: Develop a single document model in Connect (legacy)
The ph connect command is a legacy feature. We recommend using ph vetra --watch for all new development, as it provides better tooling and automatic code generation.
Once in the project directory, run the ph connect command to start a local instance of the Connect application. This allows you to start your document model specification document.
Run the following command to start the Connect application:
ph connect
The Connect application will start and you will see the following output:
  ➜  Local:   http://localhost:3000/
  ➜  Network: http://192.168.5.110:3000/
  ➜  press h + enter to show help
A new browser window will open and you will see the Connect application. If it doesn't open automatically, you can open it manually by navigating to http://localhost:3000/ in your browser. You will see your local drive and a button to create a new drive.
If you local drive is not present navigate into Settings in the bottom left corner. Settings > Danger Zone > Clear Storage. Clear the storage of your localhost application as it might has an old session cached.
- Move into your local drive.
Create a new document model by clicking the
DocumentModelbutton, found in the 'New Document' section at the bottom of the page. Name your documentTodoList(PascalCase, no spaces or hyphens).
If you've followed the steps correctly, you'll have an empty TodoList document where you can define the 'Document Specifications'.
Verify your setup
At this point, your project structure should match the step-1-initialize-with-ph-init branch. You should have:
- Empty
document-models/,editors/,processors/, andsubgraphs/directories - Configuration files:
powerhouse.config.json,powerhouse.manifest.json - Package management files:
package.json,pnpm-lock.yaml - Build configuration:
tsconfig.json,vite.config.ts,vitest.config.ts
Compare with reference implementation
Verify your initial setup matches the tutorial:
# Compare your project structure with step-1
git diff tutorial/step-1-initialize-with-ph-init

# List files in the tutorial's step-1
git ls-tree -r --name-only tutorial/step-1-initialize-with-ph-init

# View a specific config file from step-1
git show tutorial/step-1-initialize-with-ph-init:package.json
ph install / ph add
ph install [dependencies...] [--registry <url>] [--local] [--allow-build <pkg>]
Aliases: ph add, ph i
The install command adds Powerhouse dependencies to your project.
By default it only registers the package in powerhouse.config.json with provider "registry" — Connect will load it from the registry CDN at runtime.
With --local, the package is also installed into node_modules and marked as provider "local" — it will be bundled into ph connect build so the preview works without the registry being reachable.
Resolution order for the registry URL: --registry flag > PH_REGISTRY_URL env > powerhouse.config.json > default
Up next
In the next tutorials, you will learn how to specify, add code and build an editor for your document model and export it to be used in your Powerhouse package.